


THE358BANSH
-
Posts
402 -
Joined
-
Last visited
Content Type
Profiles
Forums
Events
Gallery
Store
Everything posted by THE358BANSH
-
Just a little update for this. I just got a smoking deal on three 4mm long rod cranks from Hotrods from my warehouse, brand new in the box. If someone were to buy the topend, I would sell them a crank for $375 plus the cost of shipping the crank. I need this stuff gone guys, help me out...Thanks
-
PM Sent...
-
Riding/Protective gear on a budget
THE358BANSH replied to gotta_goatsfast's topic in General Banshee Discussion
That's scary for that price. Safety is no joke for me after my stuck throttle accident. I spent a little bit more than that just on my Tech7 A-stars, but then again I like walking without broken ankles... -
Thanks. New fuel pump will be here Friday hopefully. I started it here on the old pump to inspect the pulse on the tach wire from the MicroSquirt. It definiately sounds way different with the PTs and air filters/tube. Anyways, the tach wire ended up being a 12vdc sqaure ware signal, with the pulse going high. At 1250 rpm, I was getting a pulse every 25ms roughly so now I need to back figure some numbers to see if I can make stuff work...Evan
-
Well here it is Sunday night. I sent dude a another message about the pump, but haven't got anything back. The afternoon started off well with building the entire right side expansion chamber. It's funny how the first one took two nights, and the second only took 2 hours. Funny how people learn from experience. I also built some pipe hangers for the expansion chambers and burned them on. Only thing left to do for the PTs is to weld an O2 bung in the left side when they come off to paint. Next was to figure out some air filter ducting. I had some K&Ns from my old Lectron setup, but they were 2.5" ID. The inlet side of the throttle bodies is only 1.75" so some sort of an adapter was in order. I turned some rings to fit the ID of the filter and put a nice radius on the lip. A couple of pieces of 304 stainless from the scrap bin worked well to connect the two. Welding stainless is one of the things I enjoy most in life, not really for sure why. The filters ended up sitting above the rear shock, and just in front of the battery box and relays. I think they'll kind of act like a guard from getting too much crap up by the electronics. I'll still end up having to build a second support for them. As for other updates, the rest of the parts for the rear shock should be here on Tuesday. After rating the coils, I ended up only going with a new tender spring. Reservoir mount kit was ordered also, along with a new reservoir since this one has a huge rash down the side of it. Only one other real big change may still be had. I don't want to say what it is until the deal is done because all I'll do is jinx myself, but someone should buy my parts so I can upgrade.... Later, Evan Buy me!
-
I have a got a few PMs and I guess this should have been worded differently. The engine is currently running, no air leaks or messed up pistons. It has a fresh hone with a few scuff marks left, new pistons/rings/wrist pin bearings, new 19cc domes, yada yada. Sorry for the confusion! Evan
-
Ebay member Minkia38 AKA Motor City ATV buyer beware
THE358BANSH replied to Paulie B's topic in Online Auction Watch
Anyone notice his website is no longer running? http://www.motorcityatv.com/motor-city-atv-site-is-now-open-for-business/ -
I have an entire 4mm top end I want to get rid of. It's currently on the quad, the only decent picture of it is below. The cylinders are ported by FAST with a "play" port, and are currently 65.00mm. One of the ears for the case side studs has a crack in it. It's been there since I bought it and never got worse. They are on the high side for piston to wall clearance. I had an air leak that poked a hole in the left piston, so I cleaned the cylinder with acid and bumped a hone through them to get it back together. There are a few scuff marks near the top of the bore, but nothing crazy. Pistons/rings/wrist pin bearings are Wisecos, basically brand new with less than an hour of run time and part number of PK141 for the kit. Domes are just as new as the pistons, 19cc cut for 4mm stroke from David at Noss machine. The engine pumps 175 psi at 800 feet above sea level. O-rings for the head are new also and would be included. The head is a Noss Machine piece. Both the cylinders and the head are beadblasted on the exterior. I was thinking $650 shipped for the entire topend in the lower 48...
-
http://www.demonscycle.com/Electrical-Components/Round-Key-Ignition-Starter-p4576885.html That's the link for the switch. I got it from a cycle shop in Chicago, but you can find them anywhere on the web or some local places. I am still looking for an LTR switch because it is a nicer, more weather resistant piece. Now I can wait to find the ultimate deal instead of spending $75 dollars for a used piece of crap... A few reasons for the pump are listed below... Pre '02 R1, and pre '03 R6 were carb'd so not enough pressure would be made by the pump. '02 and later R1, and '03 and later R6 are injected but use an in tank mounted pump. The LTR pump draws only 2.4 amps @ 42 psi. It flows 50 L/hr which should support 101 horsepower roughly figuring a BSFC of .8 at the highest. It's light, small, and should work great when I find a decent unit. I thought about a Walbro 155 L/hr, but the current draw compared to the Keihin pump is tremendous. I tried to keep the quad on an amp diet to make sure the charging system even had a chance... Evan
-
Just put my banshee on steroids
THE358BANSH replied to robert0762's topic in Banshee Repairs and Mods
Um, it's purple, leaded and runs 107 MON? Nothing too special there. Dump some Q16 in that bitch and rejet to feel a real change. -
I'm trying like hell to get one. I tried to contact the guy who I got the pump from to give him a chance to do something about it. He didn't respond to my email, PMs, or posts. I wrote off all chances of him responding. I left him negative feedback on LTR450HQ, and then as a last chance found him on facebook and sent him another message. He finally replied and I explained the situation. I thought he was going to tell me to get bent, but he said he would try and come up with another pump. I'm pretty sure he knew it was junk, and that's why he avoided me then started to work with me all of a sudden. In the mean time I have found another pump, and figure by Sunday if this guy doesn't come through I'll purchase it. Anyways, after wiring in the key switch I made a mistake. I had planned on using the ProDesign kill switch to provide a ground circuit to the key when the tether is in. Unfortunately, the ProDesign opens the circuit when the tether is in. On my journey to find a normally closed tether I came across the Gunnar Killer switch. I ran down to Janssen Motorsports and picked up the switch, stainless dual front brake line kit, front sprocket, shock oil, and seals/orings for the rear Elka I needed to revalve/reseal/respring. I get back to the shop and start to install the new tether. Turns out the Gunnar operates the exact same way as the ProDesign, it just uses a small solid state relay inline to reverse the action. After two hours of figuring this out, I said screw it and installed another relay to invert the action again and called it good. I now have the run position, run with lights, and when the tether is pulled it kills the entire quad. Success finally! All while this is going on I have also been trying to find some new exhaust parts. My whole idea with the quad is to make a easy riding, broad powerband, transfer onto the pipe smooth type deal. I came across a set of Paul Turner expansion pipes on E2S, which had been slightly modified into three pieces for a Banshee powered Tecate4 project. The thread was a few months old, but I called the guy anyways. Turns out his name is Adam and is known by FTGRacing on here. I ended up buying the PTs from the thread, and another set of PTs that were a little rusty for $100 bucks shipped. I had a feeling the standard PTs wouldn't fit because of where I mounted the coils, so I was planning on doing some modifying anyways. Everything from Adam showed early in the week so I decided to play with the expansion pipes to get my mind off the fuel pump. I made six pieces into fourteen and started mocking stuff up. The chamber ended up getting rotated slightly forward, down and out a little. I stripped the chrome and blasted them, added a small 4" section in the middle to connect to my Toomey silencers. They don't look that different, but they fit extremely well now. Eventually I would like to get the mid-pipes and silencer off a DMC 916 system to finish it off. After I play with the PT's for a bit, I'll start to look for some cheap nasty ProCircuits next to do my own comparision. In the mean time, I installed the front Streamline dual line kit. It's got the twin lines off the master cylinder that run down to each wheel. I finished off the night by reassembling the stage 3 Elka with a new valving setup and some new orings for the seeping compression adjuster. Last thing to finish off for the rear suspension is to rate and possibly get some new coils for the rear, and I may shorten the swinger up an inch or two. Lates...Evan
-
When you introduce a spring whether air or coil onto a shock that is on a dyno, you introduce many more variables. The main point of stroking the shock is to find force vs shaft velocity and/or position while being stroked. A spring will vary the results on both a peak velocity graph or continuous velocity style graph. Depending on where the crossovers are set and spring rates, or the pressures of the main/bottoming chamber, too many variables are introduced to have meaningful results. This is the reason why there are shock dynos, and then there are spring rating machines. That is what I can contribute to the conversation, hopefully it helps people learn a little bit more about the tools that help us do our jobs...
-
I just stated it was slightly biased because you are working the Foxs double time by not only the heat built by the dyno, but also letting them heat soak from the chambers with no airlfow to dissipate while on the dyno. It seems like there were tons of variables, and performing tests without multiple control factors lead to a biased test...
-
So you were stroking the shock with the air chambers pressurized? Kind of a biased test don't you think?
-
I know right? Last week it was 35 degrees all week and it was almost gone, than wham on Sunday we got hammered again. At least the wind isn't blowing now so that I can get out and play. After Wednesdays little test session, something didn't seem right with the tuneup. My VE values for fuel control were abnormally high up to 5000 rpm, and above that I couldn't put enough fuel in the tune up to make it run on the top end. First hand experience with other peoples stuff led me to believe I had a fuel delivery or pressure issue. I pulled the fuel rail off and welded a 1/8"npt bung on it for a pressure test gauge. The R6 fuel pressure regulator is set to maintain 42 psi, and the LTR pump should be able to bypass that value easily. I flipped the key on to see a whopping 24 pounds of fuel pressure. That's enough to idle, run, and drive with light loads, but when the revs grow pressure drops off worse. I went through and completely tested all of the components individually. Everything checked out fine, except for the fuel pump itself. It seems to put out the correct amount of volume, but cant make the pressure. I scrounged around the dyno room and found a little Walbro fuel pump and then rigged it up quick. It makes a rock solid 42 psi everywhere while running. The only thing that sucks is that the tune up to now is null and void because of the fuel pressure issue. No problems though, it shouldn't take more than a night to get back to where I am at now when I find a new pump. Evan
-
Plain and simple, yes it is worth it. You build the most power with the best parts, so why not give the same attention to your suspension? We need clear up a few things about the term "long travel". If you have a front suspension setup and "X" stroke length on the shock, it will have wheel travel based the shock travel. If you unbolt the current shock and replace it with one that has a stroke length of "X+1", you will gain wheel travel as a byproduct of the motion ratio. Adding more shaft stroke to the shock is the true long travel setup. It gives the shock a longer distance and therefore more time to displace the amount of force exerted on it. Some companies like to claim their product as long travel, when in reality all they do is add length to the arm or move the lower shock mount in. All that setup does is work the shock harder, more force into the same shock shaft distance and as a byproduct build copious amounts of heat and then fade. The big issue lies in the geometry of the Banshee front suspension unfortunately. When we add up to 3" of stroke to the shock, then multiply that with the motion ratio the wheel travel now cycles out of its sweet spot and bumpsteer becomes an issue. So in all reality, the best setup for a Banshee would be to limit the wheel travel to the portion where bumpsteer is small or no issue, and then have as much shock stroke length as possible to tune in the given wheel travel. My personal opinion, would be to take the shock package that offers the most manageability while taking a hit on wheel travel. The Float X is basically a compression, rebound, and a single air spring setup and not a bad unit at all. I personally like the Float X Evol model because it not only offers hi/lo speed compression and a standard rebound circuit, but also a "dual rate" air spring using the main chamber and the Evol chamber in tandem. What arm package brand wise were you looking at? Evan
-
Update! The key finally arrived today after a week of shipping when it was only supposed to be a day or two at the max. I wired it in quick so I could get rid of my jumper wires. It's located on the flat part of the front Lakers next to the steering stem. After testing the 'shee out last night I had a chance to play with the tune and get a good idea of where it needed work, which ended up being everywhere unfortunately. Tonight, I ended up getting a chance to do four little trips and get some good data. It's to the point that it runs and rides decent, but it's no where near the level of cleanliness I want. It's definitely rich now, all I gotta do is start pulling everything back and making some POWAH! This was my first time on the quad using the GoPro out of the racecar so I'll apologize for the quiet sound now. It seems to be fine if you crank the volume up a bit. Also, the little camera suck at picking up the headlights. I am kind of disappointed because they are bright as hell when riding but the video makes them look like crap. Anyways, check it out! Evan
-
The weekends plans got screwed with over 10" of snow dumped on us. Today was the first decent day with no wind and double digit temperatures so I made my way out, still with no key. It runs and drives and I didn't kill myself on the maiden voyage, so that's a plus! I made a few short runs up and down the field to make sure nothing crazy was going to happen. The tune is lean but not bad for a first shot, and I was able to get a few good but short datalogs so I can readjust the tune for tomorrow. Should be a fun day...Evan
-
After both Advantage Powersports and DMC telling me they won't build a muffler until April, I need to find another source. Looking for the muffler itself, and the hangers and mid pipes if you got them. Let me know what you want for the stuff...Thanks, Evan
-
Figures, I look for a week before I post this. You explain it great and then I find the picture that would have saved us both some effort. Thanks again... http://i929.photobucket.com/albums/ad137/08_BANSHEE/DMC7.jpg
-
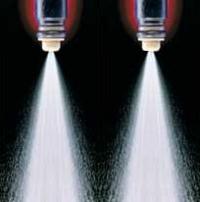
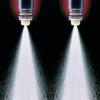
Found these cruising around ProCircuits website just now. I figure someone would sweep them up... http://www.procircuit.com/store/pc/viewPrd.asp?idproduct=55833&idcategory=534
-
Does any one have a picture or know how the mid-pipes attach to the 916 style muffler? I'm trying to figure out if they slip in, have a flange, or use a rubber coupler like the expansion pipes. Thanks much! Evan
-
Can someone tell me what exhaust this is?
THE358BANSH replied to bennny's topic in Jetting & Exhaust Forum
DMC is producing the 916 pipe again. Their site says available in late Janurary 2011. I might pull the trigger, I want them bad... http://www.dmc-on-line.com/index.php?main_page=product_info&cPath=67&products_id=323 -
It's all good Kevin. If you need, shoot me a pm if you decide to do the conversion and I can help you out with some of the fab side if needed. I had some time to mess around tonight. I was planning on getting the key, lights, and ground cable done. Unfortunately the key didn't show even though I told the guy on the phone I needed it for Friday, people are useless. I did manage to get the last two done in between fits of rage from not having a key. I didn't snap any pictures of the ground cable. It's a 6 gauge cable that runs down the left side of the chassis from the battery to the engine case bolts. It's needed because the engine in the Banshee is completely isolated on the engine mounts, and because I no longer use the factory 20 gauge ground on the stator plate. Next was the lighting system. I had all ready ran the relay and two wires to the front of the chassis in one of the wiring steps before. The lights are cheapies from an autoparts store or implement shop. As they come, they are equipped with a 35 watt H3 style bulb. In the never ending quest of trying to spend money I don't have, I figured why not upgrade the lights since I have a battery now? The HID bulb directly replaces the stock H3 bulb in the housing while the ballasts control the alternating current to the new bulbs. I used a split collar and mounted the ballasts up front under the plastics then wired up one side to do a comparison. I snapped some pictures and then finished wiring and then took some more. In the last picture, the trailer to the right is 50' long and I know that the distance to the silo in the distance is 3 trailer lengths so 150'ish. Not bad for a headlight mod that costs less than a Benjamin. I don't know how long the kit will last, it's more of an experiment to see if/when it'll give up the ghost. I have a few things to take care of in the morning, then it will be on to seeing if I die trying this thing out the first time. Not quite for sure how it will turn out, so wish me luck. Evan
-
Did you drop the plug while handling of putting it in? If a plug hits the ground, I don't even think about using it. Just get another and slap it in. Cheap insurance...