trickedcarbine Posted September 16, 2014 Report Share Posted September 16, 2014 That's actually not that bad. Clean it with brake cleaner and coat it with the Yellow top WD-40. Let it sit for a second to penetrate. Then wipe it dry. Ok, I'll point out a few quick thoughts on stuff to remember on your first flywheel tear down. Nut is Regular thread, but the Puller is Reverse thread. So it goes in counter clock wise. The threads gall easily! Check the end of your ebay puller. Check the flywheel. Use a pick tool or even a micro file to clean them up if you don't have a tap and dye kit. Be careful if you put air tools on the puller. You have to at least snug up the center piece. I've been using a 20v 1/4 impact to tear everything down and it's pretty good. Any thing more then that can do, and you're bound for broken hard ware and a torch either way. Quote Link to comment Share on other sites More sharing options...
ETR174 Posted September 16, 2014 Author Report Share Posted September 16, 2014 few drops of water? what were you expecting to come out?Well I thought there wasn't supposed to be anything until I found out my dopy cousin out the gasket on the wrong way. That's actually not that bad. Clean it with brake cleaner and coat it with the Yellow top WD-40. Let it sit for a second to penetrate. Then wipe it dry. Ok, I'll point out a few quick thoughts on stuff to remember on your first flywheel tear down. Nut is Regular thread, but the Puller is Reverse thread. So it goes in counter clock wise. The threads gall easily! Check the end of your ebay puller. Check the flywheel. Use a pick tool or even a micro file to clean them up if you don't have a tap and dye kit. Be careful if you put air tools on the puller. You have to at least snug up the center piece. I've been using a 20v 1/4 impact to tear everything down and it's pretty good. Any thing more then that can do, and you're bound for broken hard ware and a torch either way. Alright thanks, I will go wipe it with the brake cleaner and WD-40 tomorrow. And yeah I heard about the threads being reverse going into the flywheel. I got a 19.2V Craftsman 1/2" drive impact I will be using. I will make sure it's tight and I won't go crazy on the trigger. Quote Link to comment Share on other sites More sharing options...
satts Posted September 16, 2014 Report Share Posted September 16, 2014 Report back when your done Quote Link to comment Share on other sites More sharing options...
Larry's Shee Posted September 16, 2014 Report Share Posted September 16, 2014 Be sure to back the center bolt out as far as possible before threading into F-wheel. I have to laugh at you tho, afraid to fuck up with a Dremal slotting the plate, but think you're golden on adjusting the timing frequently. Hint: probably only 1% of those with adjustable plate actually adjust it more than once, lol. Quote Link to comment Share on other sites More sharing options...
91coupemike Posted September 16, 2014 Report Share Posted September 16, 2014 ^ air grinder with the $13 milling bit ftw Quote Link to comment Share on other sites More sharing options...
ETR174 Posted September 16, 2014 Author Report Share Posted September 16, 2014 Be sure to back the center bolt out as far as possible before threading into F-wheel. I have to laugh at you tho, afraid to fuck up with a Dremal slotting the plate, but think you're golden on adjusting the timing frequently. Hint: probably only 1% of those with adjustable plate actually adjust it more than once, lol. I am thinking about just drilling it now. Could I just measure out 4mm on each mounting point, mark it, and punch a hole in it with a drill instead of dremelling it out and creating a slot? Then it would have 2 holes. One stock position, one 4 degrees advanced. Quote Link to comment Share on other sites More sharing options...
Bennett131 Posted September 16, 2014 Report Share Posted September 16, 2014 The holes will touch more than likely, not only that but you should make those areas flush as well. It would be easier for you to drill, and the screws will sit flat then too. Don't be scared of screwing the plate up...if you do I will send you another one lol. Quote Link to comment Share on other sites More sharing options...
ETR174 Posted September 16, 2014 Author Report Share Posted September 16, 2014 The holes will touch more than likely, not only that but you should make those areas flush as well. It would be easier for you to drill, and the screws will sit flat then too. Don't be scared of screwing the plate up...if you do I will send you another one lol.Lol ok. If I fuck up I will just buy an adjustable lol. I still got to wait for my flywheel puller Friday so it won't be until then that I can do it. Quote Link to comment Share on other sites More sharing options...
trickedcarbine Posted September 17, 2014 Report Share Posted September 17, 2014 There's a write up on how to do your stocker. I guess 4mm is close. Probably not exact but they are about a MM apart on the billits. Quote Link to comment Share on other sites More sharing options...
ETR174 Posted September 17, 2014 Author Report Share Posted September 17, 2014 There's a write up on how to do your stocker. I guess 4mm is close. Probably not exact but they are about a MM apart on the billits.Sparky has a video on YouTube too. I decided to just mod it and I an getting new carbs now Thursday. Quote Link to comment Share on other sites More sharing options...
ETR174 Posted September 18, 2014 Author Report Share Posted September 18, 2014 (edited) Well got my flywheel puller in early. And of course my dad doesn't listen to me and buys it from none other than Ray. At least it works. Still he paid $5 more than average. Edited September 18, 2014 by ETR174 Quote Link to comment Share on other sites More sharing options...
Deadbeat Posted September 18, 2014 Report Share Posted September 18, 2014 use a round file to elongate the holes if you have nothing else, hell you could slot that shit with drill with enough enthusiasm Quote Link to comment Share on other sites More sharing options...
ETR174 Posted September 18, 2014 Author Report Share Posted September 18, 2014 I'll see what I can do. I may not be able to do it today I will see. I will have to find the Dremel too. Quote Link to comment Share on other sites More sharing options...
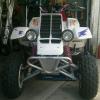
ETR174 Posted September 19, 2014 Author Report Share Posted September 19, 2014 So ummm.... Thoughts on the grinding?... Other than it looks like shit Quote Link to comment Share on other sites More sharing options...
sprinklerman Posted September 19, 2014 Report Share Posted September 19, 2014 What'd you use? An angle grinder? Quote Link to comment Share on other sites More sharing options...


Recommended Posts
Join the conversation
You can post now and register later. If you have an account, sign in now to post with your account.