bansheeman2002
-
Posts
61 -
Joined
-
Last visited
Content Type
Profiles
Forums
Events
Gallery
Store
Everything posted by bansheeman2002
-
BANG out the right pipe
bansheeman2002 replied to bansheeman2002's topic in Banshee Repairs and Mods
needs a rebuild 30 psi on the right 90 on the left -
BANG out the right pipe
bansheeman2002 replied to bansheeman2002's topic in Banshee Repairs and Mods
thanks guys im going to start with the carbs how and where do i set the gap on the fly wheel im great with 2 strokes but this is my first shee -
ok here we go....was going to take the shee out for a ride the other day didnt get very far.....came home bangin and popin out the right side pipe shootin flame too, i switched the plug wires and its still on the right side rules out coil, wires and caps right? so im guessing it is a carb issue on the right side next step is to take the carbs off and deep clean them and check the reeds oh yeah and my flywheel was loose but got that all takin care of and it still bangs out the right side and ideas or othere things i should look for?
-
thanks i like it too
-
-
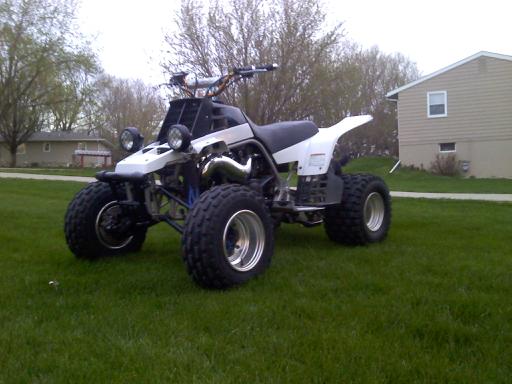
so i cleaned her all up and tool all the decals off...what ya think?

-
GOTTA PUT MY BANSHEE BACK IN THE SHOP
bansheeman2002 replied to DYNAMITE's topic in Banshee Repairs and Mods
i always run my bikes at32-1 mix more oil more reliable but a little less power -
thats how i do it at the pump put the oil in then put the gas in and move the nozzle around during fill
-
for the shee axle swap you will need a shee brake hub and rotor the blaster sproket hub will work the blaster wheel hubs will also work or you can run the shee hubs and run the shee 9"wheels and if you like i can send you a template to mount up a gsxr caliper thats what i run there are a huge amount of things you can do to a blaster to improve it,
-
for budget friendly suspension you can bolt on some stock shee shocks on the front and mount up a 400ex shock on the rear thats what i have for my set up and works well ken occoner on blasterforum makes a bushing kit to bolt up the 400ex rear i wanna say its like 20 bucks like i said if ya need anything just send me a pm ill be glad to help
-
i have a blaster that i use for harescrambles almost everything on it is aftermarket......mine is ported and i run a 34mm pj...have any ?'s feel free to pm me id be glad to help with your project
-
razrs or holeshot are a good choice i run 20-11-9 razrs and like em
-
i was kinda wondering the same my banshee had one on it when i bought it
-
this is how i do it and have had great results start it up let it idle blipping the throttle now and then get it up to operating temp then shut down and let it cool completely just let it sit for a half hr or so <-----this is a heat cycle i do 3 heat cycles then i will go for a short ride variing the throttle but no wide open throttle go back home shut it down and let cool take it out again and do the same as ^^ but doing short bursts of wide open go home let it cool then ill just take it easy for a tank of fuel then let her rip!!!!
-
Lots of good parts
bansheeman2002 replied to sandracer1986's topic in For Sale - Parts & Accessories
25 shipped on the bumper??? pm me -
use some mothers polish on the silencers
-
thanks.
-
ok been working on the a arm skids today i got everything done but the one side drilled and mounted here is a pic with the template one side the other side and the one mounted up here is an over view of the tools i used and the cost tools: jig saw with a blade for metal - had jig saw blades cost like 3 bucks couple wrenches punch to start the drill holes rubber mallet to tapper the from of the a arm skids sharpie marker some cardboard cost of parts: jig saw blades 3 bucks nuts and bolts 3 bucks brackets 2 bucks diamond plate 23 bucks overall a simple cheep way to make some nice strong skids
-
i just put the brackets right on the frame...i got them at a local haedware store in the plumbing dept. it fit nice and snug to the frame i had to put a slight bend in the plate because the bottom of the frame is curved got my plate at the local steel/scrap yard for 1.70 a lb i paid like 16 bucks for thos 2 pieces
-
i got mine at a local steel/scrap yard i paid 1.70 a pound for the 2 pieces ill post up the a arms later today
-
the bracket just have one of the bolt holes cut off and wrap around the top of the frame tube then bolt to the diamond
-
yep total cost of diamond bolts and brackets was 27 and some change
-
going to make some a arm skids tomorrow
-
first i used cardboard to make a template what i started with brackets i used i cut one side off all bolted up i put the smooth side down and the diamond up
-
**BansheeHQ is now a registered trademark!**
bansheeman2002 replied to locogato11283's topic in General Banshee Discussion
congrats