Leaderboard


Popular Content
Showing content with the highest reputation since 01/23/2013 in Posts
-
Suspension discussion I’m not really sure that there is a comprehensive guide to ATV suspension anywhere, much less a banshee, so I’ll do my best to throw as much info into this as possible. Terminology (in no particular order): Camber- defines how the tires lean in at the top. The more elevation changes from your left to right (uneven surface or steep berms), the more camber you may want. 1-6* is common. Toe- the inward facing angle of the front tires when viewed from above. More is good for stability in corner exit, straight lines, and rough terrain. Less is good for smooth and slow speed terrain. 2-6* is common. Caster- defines how the top of the steering angle leans back when viewed from the side. Use more caster for rough terrain. Flat track is commonly 1-3*. Desert racing is commonly around 7. Everything else is usually in the middle. Helps keep the tires straight under impacts. More caster will give more camber on the outside tire when turning and can help dig more. Some people add caster to prevent the tire from rolling over the sidewalls on the outside tire, but the real solution isn’t more caster; its to add more tire pressure. Steering Angle Inclination (SAI) or King Pin Inclination (KPI)- the line drawn between the pivot point of the upper and lower ball joints, and how that line is related to the centerline of your tire when viewed from the front. Basically the same as caster except viewed from the front. You can’t change this unless you use different knuckles. When you turn the handlebars, this is the angle your tires turn around when viewed from the front. Google has sufficient info on this. Included angle- the combined angle between KPI and camber. Since you can’t change this with practically any independent front suspension ATV, it is irrelevant here, but it is easy to mix up with KPI. Scrub radius- the distance between the KPI and the center of your contact patch where they meet the ground. This is your #1 contributor to feedback. This is usually 1” or so. You want it at around 1/8”. Different offsets, different tire heights, different tire pressures, camber settings, and different tire profiles affect this. A positive scrub radius means that when you hit something with a front tire, that tire will push back and turn the bars (feedback). A negative scrub radius will make the tire turn the other way. Zero scrub radius can be unpredictable in rough terrain. Flat track setups can vary the most (flat tire profile). 4/1 rims are very good for tires under 21”. 21-23” front tires can be made to work with 3/2 offset, but will come down to rider preference. 95% of all setups will benefit from a 4/1 rim setup. Wheel spacers are neither mechanically not geometrically wise. Scrub- how the tires move in and out through the suspension stroke when viewed from the front. Rake- the angle that the suspension leans back in front. Helps with rough terrain, sudden impacts. Compressed length- the length of the shock when fully compressed. Some give this number when the shock body contacts the bumper, some give it when the bumper is pushed through. Some give both. Too long will cut available up-travel. Too short will cause you to lay the frame on the ground. Extended length- the non-compressed length of the shock. Too long can bind ball joints. Too short cuts ground clearance. Leverage ratio- the ratio of vertical wheel movement to shock shaft movement. Also called a motion ratio. 1.7-2.8 is common. 2-2.4 is most common. 11” of wheel travel and 5.5” of shaft travel equal a 2:1 leverage ratio. Lower ratios are usually better. Long travel- doesn’t necessarily mean more travel. It can be more wheel travel, it can be more shaft travel, it can be both or neither. What it means for the ATV crowd is that the setup in question will have leverage ratios have been altered, usually in favor of a lower ratio. Long travel also means a longer than standard shock is used. Longer shocks are a better choice the majority of the time. Standard travel- uses OEM compressed and extended length shock specs. Preload: how much a spring is compressed beyond its resting length. This is also used when adjusting ride height in that adjusting the retainer down will compress the spring(s) more and increase ride height. Compression- the resistance the valving has to being compressed. Low speed compression- the resistance the valving has to being compressed when compressed slowly. Affects body roll, brake dive, bottom out resistance on the face of a jump or very smooth landing of a jump. High speed compression- the resistance the valving has to being compressed when compressed quickly. Affects impact resistance, choppy terrain, slamming the suspension. NOTE: low or high speed compression has to do with SHOCK movement speed, not ground speed. Rebound- the valving’s resistance to the shock extending too fast. Faster riders and choppy terrain need less rebound. Bump steer- how toe changes through the suspension motion. Feedback- force felt from the terrain that is felt in the handlebars that wants to turn the bars. Feedback and bump steer are NOT the same. PLANNIING A SUSPENSION SETUP This is where most of you fuck up. This assumes you have the money required to build a functional and safe setup. Pick your riding terrain. XC, MX, desert, drag, hillclimb, etc. This will determine tire size, a-arm width, and swingarm length. Choose a-arms based on width required, find companies that offer that length, then take the time to research the company’s background. This is critical for one reason: ball joint limitations. This is a simple concept that isn’t very easy to explain without pictures, so I’ll include this short list: LSR: mostly desert, some MX, some XC. Drag guys, you already know what you’d need from them anyway. Roll Design: mix of desert and MX Fireball: MX, general purpose Alba: desert, General purpose Laeger’s: MX, some desert JB: MX, some XC Fireball: general purpose, dunes Next is swingarm selection. Very simply, shorter is more agile and rider input is easier to see, but they are inherently less stable. It is also much easier to transfer weight front/rear and side to side. Due to a shorter swingarm’s steep angle when at ride height, they can cause the rear of the quad to lift under acceleration. This raises the COG and can cause you to wheelie much more easily. A shorter swingarm will have less travel as well, but will have a lower leverage ratio. Longer is more stable but will reduce turning ability. The major downside beyond handling is weight distribution, but most uses of an excessively long swingarm have no interest in quick cornering. Since they sit at a flatter angle, lifting is far less of an issue. 80% of trail and MX banshees will find the best handling at -1.5 to +2.” This is largely because a banshee is very front heavy and the fenders don’t allow sufficient movement to get enough weight over the back. A -1” swingarm, race position pegs, forward a-arms, lowered subframe, rigid 19” tires, and a wider axle will cut seconds off a lap time. Not tenths. Seconds. XC is very similar out back to MX. Dune guys usually want +2 to +6. No-link setups are best served by relocating the upper shock mount. Otherwise, the leverage ratio will be sky high but it is still doable for some scenarios. Don’t think that the 3-4lbs you save from going no-link will benefit you if you don’t have a good shock built. Solid struts don’t apply here. Choose tire size next. MX setups with front tires ranging from 18-21” can be useful. Rear tires are usually 18-20”. 20/18 is a common setup. I prefer the smallest front tire I can get away with and 18” rears. Bigger tires add comfort and absorb impacts better. Small tires are more nimble and deform less under heavy stress. XC is doable on 20-23” fronts and 19-22” rear. Know your terrain for this. My preference for XC is 21/20. Once you have the frame, arms, link (if used) together and tires INFLATED TO RUNNING PRESSURE, lay the quad down onto 2 2x4s lying flat on the ground. Place one under the frame rails at the pegs and another under the frame rails before they rake up. For MX or TT, use a treated 2x4. For drag, use a treated 2x4 in front and a full size in rear (big tires compress more). For others, use a full size 2x4. Ballpark the alignment. Accuracy isn’t important at THIS step. Just make sure the tires are roughly straight ahead and that the camber isn’t more than 10 degrees. Measure eye to eye where your shocks mount for compressed length front and rear. Accuracy is important here. Check both front lengths to make sure something isn’t bent, broken, etc. Lift the quad up until the instant the tires come off the ground and keep the lower frame rails level. Depending on your components, this may be your front or rear tires. Measure from the 2x4 to the lower frame rails. This is your travel number. Continue lifting until the other tires lose contact and take your second travel measurement. Completely lift the quad off the ground so that the tires hang. Measure eye to eye for both front and rear. This is extended length. Subtract your compressed length from extended length, then divide your travel by this number. Travel/(extended length - compressed length) = leverage ratio. You may end up with something like this: FRONT 14” compressed length 19.5” extended length 11.5” travel 11.5/(19.5-14) = 2.09:1 leverage ratio REAR 9.5” compressed length rear 13.5” extended length rear 10.3” travel rear 10.3/(13.5-9.5) = 2.58:1 leverage ratio Just copy this to yours and fill it in here: -Compressed length -Extended length -Travel -Travel/(extended L-compressed L) = LR NOW you can call a shock builder with this info, your weight, experience, etc. Some will ask different questions, some will ask these, some will ask a mix. These are the fundamentals, but some builders will know some of this info already. Ask them about what brand and model shocks fit your basic dimensions. If they don’t have them on hand, buy them used and send them in. If you don’t do things this way, you will almost certainly run into a chassis that bottoms out easily, that rides far too high, that doesn’t soak any terrain up, etc. It is VERY possible to Frankenstein a setup together and it perform at the national level, but that rarely happens. SUSPENSION KITS This is the way most of you will go. For the average rider, this is good enough and requires less effort, but the above method is better and will guarantee better performance. There are 2 main issues with kits: the shock manufacturer will likely not set the shocks up with the best setup, and you may not be running the tire height that the setup was designed for. Yes, they may be “setup for your weight and riding style” but that doesn’t mean jack about whether they did a good job or not. If you have problems with suspension or are talking up your setup and the words “setup for my weight and riding style” then you’ve lost all credibility. You’re just regurgitating words off of a product description. -Elka has a solid reputation for sending great shocks out the door with shit setups. Always set money aside to send them to a shock builder after you test them and see what they need. -Works are usually fairly accurate but don’t perform at the higher levels. Low-cost. -Fox are hit and miss but are extremely capable. Cheaper to rebuild. -PEP have a reputation for having a very accurate setup out of the box. 250R guys are PEP fan boys, but for good reason. Also, $$$ -Motowoz are good, inexpensive shocks and people swear by them, but none of the pro guys I hang out with talk about them. -Axis are usually fairly accurate but occasionally miss the mark. Arguably the best quality shock you can buy. More 250R fan boys. -Exit are gaining a lot of attention and perform really well. -Stadium reputably have the single most accurate setups out of the box. Hands down most comfortable shocks I’ve ever been on. -TCS were great at one point but not many parts available to the builders I’ve used. I’m not up to date on TCS so take it with a grain of salt. -Öhlins are very good shocks, but very few quad guys run them. If it’s any consolation, I am sponsored by Fox and have no plans to change that. They’ve been good to me and are precisely what I need. The best piece of advice that I’ve ever heard regarding picking a shock manufacturer was “just pick a top brand and go with them. They all have an equal chance of getting the setup right the first time. If not, send them to a builder. Don’t think too far into it.” Furthermore, the top shocks today (in no particular order) are Elka stage 5, Fox Evol, Pep PB1, Custom Axis, and Stadium. Whatever you do, pay for something with more adjustments. As for tire size, your shocks are going to be setup (as they usually are) for a wide demographic, so that would fall with a 21/20 front/rear. I got my second set of Fox installed on my main quad and it was very bottom out happy. I called Fox and my rear shock had a compressed length that was meant for a 20” rear tire, not 18”. This matters for 2 reasons: 1” less ground clearance at full bump, and the valving wasn’t optimized for the leverage ratio given with my measurements on an 18” tire. The leverage ratio of the linkage and swingarm setup drop severely (along an exponential curve) as you approach full bump, so I should have had a lot more bottom out resistance a good inch earlier in the travel. Fox sorted this out very quickly. SETUP Take the time to take the springs off your shocks and double check the compressed lengths so that the frame rails aren’t too close to the ground and make sure that the shocks bottom out before the ball joints bind. You can usually disassemble aftermarket shocks in a few minutes. Reassemble the shocks, bolt them up, and make sure your tire pressure is set how you want it. Set caster first. This should be 1-5 for TT, 3-6 for MX and XC, and 5-8 for desert. The rule of thumb is that the greater the chance your tires are going to lose contact with the ground in rough terrain, the more caster you want. If you do general riding, 5 is a great start. ********** Everything after this point will require you to get on the quad and have someone take measurements. ********** PROCEED IN ORDER Set ride height. You measure this under the frame rails just before they rake up in the front and under the pegs. This measurement is given F”/R”. You usually want 4.5-6”/4.25-6” for TT, 6.5-7.5”/6.5/7.5 for MX, 7-8”/7-7.75” for XC, and 7.75-10”/7.5-9.5” for desert. I run 7.25/7 for most MX tracks. Some people fall outside of these ranges. Most fall within them. If you don’t know that you need something different, go with this. Lower will corner better and be more stable but requires more compression so it will be stuffer. Higher will be more comfortable but will tip and dive more. Rear can be equal to the front or lower, but almost never higher. This does not apply to drag or hillshooter setups. Set camber next. Turn one tire straight ahead. Put a square beside the tire with one side on the ground and one against the tire. You want roughly 1/4” from the sidewalk to the square. Add more for hard berms and uneven terrain. Subtract for smoother surfaces. More camber digs into corners better. Less camber brakes harder and tracks a touch straighter in some cases. Do this with both tires. Set toe next. Measure from the center tread on both tires in the front and rear of the front tires. You usually want between 1/8” and 3/8” total. Less can be darty and works for low speed stuff. More can be better for high speed stability but too much can be dangerous. Make sure your bars are straight. Once you’re riding, setting the valving can be done in any order but I follow these steps: *NOTE* do not EVER run the compression all the way in. This is a good way to destroy shocks. 2 clicks from max is safe. 1 is still pretty safe. Drop high speed compression all the way. Run low speed compression almost at max. Run rebound at max. Go for a ride at a slow pace. Every time the shocks bottom out, add 2-3 clicks high speed compression. If you get into a series of rough terrain and the shocks soak up the first few bumps very well and then get stiffer and stiffer or bottom out, or if the back kicks up hard off a jump face or off a bump, back the rebound out 2-3 clicks. I prefer all the low speed compression I can get, but if you want more comfort, run it all the way down. Every time it rolls excessively or wants to bottom out going up the face of a jump or landing softly rom a landing, add a little low speed compression. Generally, valving is a mix between performance and comfort. You want the softest compression and highest rebound settings you can get away with. Write these settings down for each place you ride. It only takes a minute to adjust them. As you get closer and closer to max adjustment, you may want to consider a revalve. If you find that you’re getting close to maxing your compression or at minimum rebound, you can do a few things: raise ride height (effective), run a higher tire pressure (short term patch), or send the shocks in for a revalve (best). When you do, keep the settings where you currently have them and let the shock builder know this. Tell them every complaint you have. Tell them when the shocks underperform. It may take some of you 3-4 revalves to get a truly good suspension setup. When I last called my builder for a revalve, I told them this: “I need more high speed compression, a little more low speed compression, and the rebound is fine.” You can ballpark your thoughts, but let your adjustments lead your decisions. If you do it right, the adjustments won’t lie. Don’t call and say, “I’m getting faster and the shocks aren’t good enough.” They don’t know how they aren’t good enough unless you tell them. They’ll have to reference their charts and you may hate what they’ve come to find works well for the majority. Side notes: If you want to run YFZ shocks on standard travel banshee arms, read this entire thing again. If you still want YFZ shocks on standard travel arms, just go ahead. You won’t listen anyway. As stated earlier: set up for your style and weight isn’t the magical phrase that means your suspension is golden. It could be complete shit. Any shock manufacturer is going to only be “somewhat likely” to nail your needs at best. I’ve seen Works and Elka perform out of the box extremely well. I’ve seen Custom Axis and modified Evols perform like shit. More often than not, Fox, Axis, PEP, Stadium, and Motowoz perform very well out of the box. No one manufacturer is always going to nail it. The rule of thumb is that the more you pay, the better quality shock you’ll get and the better chance you’ll have at getting a solid setup the first time. Suspension is just like the rest of your quad, you should build it around the way you ride, not ride it around the way it is built. There is definitely more to it than this and this is NOT a comprehensive guide, but this should be enough to get you going. Sent from my iPhone using Tapatalk6 points
-
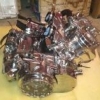
Guy sends used motor and trans from hack. Other Guy puts motor together and figures out trans was hacked. Other Guy then tears down motor and assembles again. Electrical Guy forgets to plug in Dyno. Other Guy fiddle fucks with used carbs instead of ordering new. Other Guy waits 4 months with motor in Dyno bike and eventually Guy gets impatient. Other Guy and Other Guy's Wife then pulls motor from Dyno bike and says they will refund Dyno price. Motor is shipped in Dog Shit Box and months later the refund never comes. Guy upset he's not been paid, and now has way to many rags, so he made this thread. Other Guy who should have clues on how to ship a motor says "excuse, excuse, excuse, enjoy the free rags"6 points
-
Ok I guess I can load one bike up tonight Sent from my iPhone using Tapatalk6 points
-
https://www.facebook.com/events/269595600213802/?acontext={"ref"%3A"4"%2C"feed_story_type"%3A"308"%2C"action_history"%3A"null"}5 points
-
Cascade Innovations is having a spring sale on select Billet Aluminum 10% - 60% off - See our website for Details http://www.cascadeinnovations.net/ Also enjoy free shipping on orders over $75 We are having a close out sale on Blue, Red, White, Yellow, and Purple Chain sliders --- ONLY $8 each! http://www.cascadeinnovations.net/store/store_view.cfm?store_area_id=3&STORE_DEPT_ID=105 points
-
Shut the FB group down, and tell the others to come back to the forums.4 points
-
If you didn't blow yourself up sucking fuel with a shop vac, you'll be fine mixing different brand oils. Seriously, that is the stupidest thing I've ever heard of.4 points
-
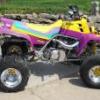
Well guys, I'm officially a banshee rider again! I finally got everything put back together and in good shape this afternoon. Needless to say, I immediately hopped on it and took it down the back roads a bit. The first ride lasted about 3 min and was terrible tho. It scared the piss out of me. So i slid back up into the driveway furious that I was unable to ride my shee anymore. So I parked it and said many cuss words regarding the bitch that caused the wreck that took my arm. I just went inside, grabbed a budweiser and sat down. Well, after about half way through my beer I said fuck it, I refuse to give up that easily. So I took it back out for round 2. Took it easy for about a mile or so kinda playing with the throttle in higher gears trying to get used to the powerband. after a few minutes it started feeling better to me. Before I knew it I was wrapping it out in 6th and grinning like crazy. It's definitely going to take some getting used to, but I think I'll ok. Not gonna lie guys, after spending the last 6 years thinking I'd never get to ride it again, I had tears of joy when I hopped off and looked back at it. 🍻4 points
-
I just prefer it to come with a hole so I can put my D**K in it.4 points
-
I finally got some time to build. Sent from my SM-G900V using Tapatalk4 points